SUSPENSION - Basic set-up method
Time to arrange all those agonised over, carefully selected and applied suspension components to give of their best.
Suspension - Basic set-up method
part numbers: TOOL10, TOOL11, HILO, HILO-01
Time to arrange all those agonised over, carefully selected and applied suspension components to give of their best.
This is one of those subjects viewed as a ‘black art’, largely because of lack of understanding and confusion. The confusion part is because folk encompass the whole suspension set-up deal with suspension arrangement and design, lack of understanding instilling terror at the thought of ‘fiddling’ with the suspension components. The latter also fuelled by the knowledge that expensive specialist measuring equipment is needed. Well, there is no black art – you can work the magic. More a case of a long day...
SUSPENSION - Terminology
Glossary of terms used in the suspension on the mini.
The Mini has consistently more than proven its capability in competition with very limited and cost-effective modifications based on the standard equipment fitted. Having first ensured the bodyshell (in reality little more than a complex bracket to hold suspension and driver securely in place) is well sorted out by removing all cruddy or rotten metalwork and into something like straight, square and strong we, maximising suspension stability and geometry pays dividends in the enjoyment that is driving a Mini. Understanding what the individual ingredients are helps in pursuing what you want from the experience.
Smooth Mover
Good, reliable, and consistent handling is dependent on a number of factors. At this stage, we’re concerned with clapped out or badly adjusted suspension components. Stiff, seized, partially seized or slack, sloppy, worn out suspension components will cause inconsistent, wayward, confusing and – more important
Super Mighty Minis Championship. Rounds 2 and 3.
Brands Hatch was the latest venue to host round 2 and 3 of the Super Mighty Minis Championship in 2003.
On a gusty Easter Sunday morning I qualified 8th I could have done better, but I was still getting to grips with the first corner – the infamous Paddock Hill Bend...
Brakes - Fitting Discs and Required Ancillaries
What you actually need for the disc/drum conversion is pretty straightforward. Disconnect the steering arms, top and bottom swivel-pins, CV joint, and flexible brake pipes at the subframe - that’s it. There are, however, a number of ancillaries to consider.
Basics
Basics Fitting discs designed for the Mini is easy enough. Just make sure you use CV gaiters for the disc-brake set-up - these have a different bellows shape to stop the gaiter rubbing the inside of the hub. The drum type will rub, then split, shedding grease all over the place. Moly grease is mighty mucky stuff to deal with and doesn't assist braking at all! A tip for racers - to stop the gaiters over-expanding when getting very hot and imitating the aforementioned, put either a decent sized split pin or (my favorite) a piece of very small bore pipe - as in the type supplied with WD40 aerosols, etc. - under the retaining strap on the drive shaft. This allows air to escape and return,
Clutch - Adjustment of operating linkage
This is one of those areas where there is more than one way to skin the cat - depending on who you speak to. This is the method I have used for eternity, which has been totally reliable and never had a problem with.
This only applies to non-Verto type clutches, as the Verto types are not adjustable. You just have to make sure all the operating linkage components are in good order.
First off, ensure your operating linkage is up to scratch. For details on this, see 'Engine transplants - Clutch and flywheel'.
Satisfied all is OK, you can proceed with setting the linkage up.
1 - Remove/disconnect clutch return spring.
2 - Undo throw-out nuts (15/16"AF nuts on outer end of plunger) lock nut and back nuts off away from clutch cover.
Distributor - Initial ignition timing set-up.
Any deviation away from the original standard engine specification, or where a dizzy from another source is used in the engine you have, the ignition timing will generally be different from that set by the manufacturer.
Terminology -
Dizzy - Distributor
TDC - Top Dead Centre
BTDC - Before Top Dead Centre
ATDC - After Top Dead Centre
CR - Compression Ratio
Tacho - Tachometer, rev counter (not to be confused with Mexican food delicacy!)
Vac - vacuum (pipe, unit, etc.)
Any deviation away from the original standard engine specification, or where a dizzy from another source is used in the engine you have, the ignition timing will generally be different from that set by the manufacturer.
Exhausts - Basic information
The sheer volume and diversity of bolt on goodies available for our cherished Minis underlines the fact that a very large portion of them is modified in some way. Be it just dress up items to personalise it aesthetically, or tuning parts to improve performance.
In the latter’s case, either more power or more economy are sought - both being desired by many. Should it also enhance the looks at the same time, so much the better. Unfortunately not many components can achieve this without integrating with a number of others. The exhaust system, however, is one of the few.
Although the exhaust’s efficiency and effectiveness is reliant on a well matched system from the exhaust valve in the cylinder head to the tail pipe, the majority view it as two separate pieces - the exhaust manifold, and the ‘system’. Not entirely mis-placed, as this is how vendors present them - folk buying one or the other, though mostly both, dependent on guidance
SU Carbs - The history
Practically every Mini owner can name the brilliant engineer responsible for our obsession. Many can name the man responsible for the rubber suspension spring.
A goodly number know a fair bit about the engine's heritage and the man who came up with the extremely efficient cylinder head design.They account for the biggest chunks of the Mini's anatomy. But what about that other extremely simple yet hugely effective instrument that features so prominently when engine tuning occurs - the SU carburetter? A limited few can tell you what 'SU' stands for, extremely few have any idea of its concept and evolution. So let's put that right… In the beginning Strangely enough, it all started way back with William Banks Skinner; one of the owners/directors of the well-known Lilly and Skinner footwear distributors.
Suspension - Dangers to consider when altering ride height
The crux of the problem is the suggestion that fitting Hi-Los (or some such) will afford you the convenience of winching the ride height up when carrying a larger than normal load
I have been fielding a lot of questions re raising and lowering Minis, mainly from our foreign brethren. The increase in exported Minis to farther shores has revitalized interest in our precious Mini, indeed some new owners have rarely seen one of them and are delighted by it's 'cutesy' character, unbelievable road-holding and the discovery of the plethora of (relatively) cheap, readily available spares and accessories.
One of the first 'tuning tweaks' applied is dumping the car in the weeds. The Internet has also played its part in increasing interest in the Mini. It also provides near-direct links from the beginner ('newbie') or first time owner with those who have extensive knowledge and experience in dealing with our favourite little car.
BG5101MS - Fitting instructions - STEERING COLUMN ADJUSTER BRACKET
This bracket is designed to adjust the rake/height of the steering column and wheel. Incorrect fitment will cause premature wear and damage to steering column and rack, so the following MUST be adhered to.
1. Remove column to mounting bracket shear bolt. If the bolt head has actually been sheared off, this is easily accomplished using a small centre or pin punch, working around the edge of the...
IMPORTANT NOTES ON FITMENT OF ULTIMATE GPA DRIVETRAIN - C-BTA1270
Fitment of the Ultimate Drivetrain Kit is as Cooper ‘S’ Drivetrain assembly except for the following points:-
1 When fitting driveshaft to CV joint it is always advisable to Tig weld CV joint inner race to thick circlip in two places.
2 When installing large alloy side covers please ensure a flat and spring washer are used in conjunction with 5/16 unc x 11/4” bolts, so as bolts do not bottom out in gearbox casing
3 When connecting Hardy Spicer joints to output shafts using 3/8 unf bolts, a small amount of grinding will be needed on one of the bolt flats to enable location and locking on to output shafts.
4 Before sliding driveshaft into Hardy Spicer coupling ensure splines of both are thoroughly oiled and greased.
5 Centralise steering rack and set up steering geometry
6 After installation of kit remove suspension units and CV joint nuts and move suspension through full bump (ie up) and rebound (ie down) and check that in both p...
16.07.07 - Silverstone Report by Keith Calver
After a monumentally busy start to the year work-wise, I made a concerted effort to get the car sorted to get back out there and have some fun. My plans for stripping the car back to the shell and re-checking all the suspension alignment starting from the shell and subframes went to hell in a hand cart, so it was a case of building an engine and doing my best to re-sort the suspension geometry to try and suss this weird and inconsistent handling ....
02.09.07 - Donington Park Report by Keith Calver
Once again I found myself swamped with work causing the now familiar last minute rush to check the race car over before departing to Donnington. This race weekend was going to be a very different affair than what has become the norm. Karin was having to work the weekend, my 'opposition' in my class and in another Clubby - Steve (Young) - has resigned himself to doing the last race of the year at Oulton park due to work pressures, and stats man and hospitality provider Keith (Manning – now Otto v
C-AJJ3360 On-car adjustable bottom arms and C-STR631 race spec bushes By K Calv...
Having put a season and a half of racing on these components I am suitably impressed. The bottom arm design is superb and the finished article extremely well made. The bushes are the icing on the cake.
Accurate suspension set-up is time consuming at the best of times, requiring dogged patience...
British Motor Heritage Mini Body Shell Build
At the end of 2007 we were kindly invited up to the British Motor Heritage centre in Witney scheduled for the end of January. As luck would have it, this nicely coincided with the latest build of Mini Bodyshells.
Having donned our safety glasses our tour began. Anyone at this point that had visions of an automated production line, with robots and machines doing most of the work was going to be disappointed.
27.06.10 Thruxton Race report by Keith Calver
Following the Brands Hatch race, all was well with the car. Just as well – I was playing catch-up with grinding heads after my nice new grinder tool holder fell apart, and it took the makers 4 weeks to get it back to me. That and magazine work and an emergency engine build for a customer. I made enough time to give me a full morning on the car before having to load it up. Nothing bad came to light. As the race was the last day of a 4 day 'jolly'....
35th anniversary
We made it, 35 years of trading and still going strong. Keith Dodd started selling Mini parts from a small garage in Bowes Road London in September 1975.
After only a few years in Bowes Road it became obvious that Mini Spares needed more...
Major Player in the Mini Market
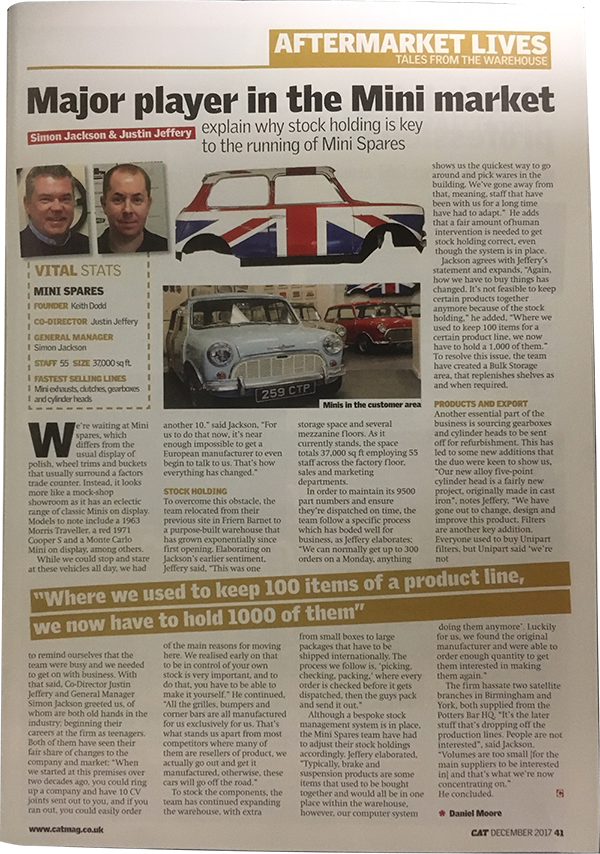
Simon Jackson & Justin Jeffery explain why stock holding is key to the running of Mini Spares
Historical Article - Nov 1991 - Richard Mansfield's Twini Mini
Our customers car is a 1962 Austin Mini, which originally cost £250.00 and now looks absolutely standard
and truly immaculate. Only when you look inside do you realise it is a car with a difference.
Richard has already restored two Coopers to a very high standard and his criterior on the Twini was to use
as many secondhand production car parts as possible to keep the cost down.
|